MECHANICAL TESTING OF MATERIALS
There are a wide range of tests, many of which are standardised, to determine the various mechanical properties of materials. In general, such tests are carried out to verify the material’s intrinsic properties against AS/NZ or ISO standards.
Materials & Testing Laboratories Ltd (MTL) has a fully functional mechanical laboratory to facilitate all mechanical destructive testing. Our scope of work starts with receiving customer’s raw samples and shaping them in-house for the tests to be performed. This will include cutting, milling, turning, grinding, polishing, or any operation to bring the sample within required tolerances. Tests are then performed under controlled conditions and an IANZ endorsed report summarising the test results is issued.
Contact us to find out how our mechanical laboratory can help with your business compliance.
Our laboratory can perform classic standardised mechanical tests such as:
- Tensile Test
- Charpy Impact Test
- Hardness Test
To complement weld inspections, the following tests are performed:
- Transverse Tensile Test
- Macro Examination
- Bend Test
- Nick Break and Fracture Test
In line with our commitment to provide answers to the unique requirements of each of our customers, we also conduct tests such as:
- Polyethylene (PE) Pipe Testing
- Ladder Testing
- Shear Vane Calibration
- Bond Tension Test
Custom Tests
Contact us to find out how MTL will work with you to tailor a solution to
your circumstances and find the answers to your mechanical testing needs.
TENSILE TESTING
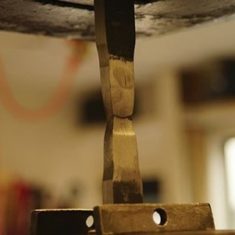
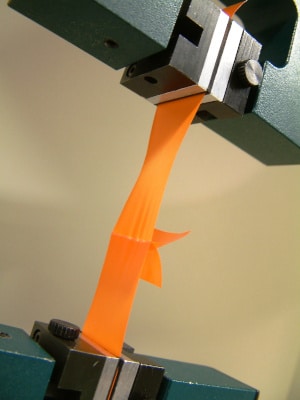
A Tensile Test, also known as Tension Test, is probably the most fundamental mechanical test that can be performed on a material.
Classic Tensile Testing
A specimen is subjected to a gradually increasing load (force) until failure occurs.
The load-displacement recording is used to obtain the stress-strain curve for the material.
This enables properties such as ultimate tensile strength, yield (or proof) stress, tensile stress and % elongation to failure to be calculated.
Other Applications
Being able to pull or push allows us to test for many different applications including:
- Weld strength using a pull apart test.
- Metal plates can be tested across their thickness perpendicular to the rolled direction.
- Nails can be pulled out of timber to know their resistance.
- Strips glued together can be pulled to establish their resistance to shear.
- Polyethylene pipe fused welds can be tested for brittleness or ductility.
Tensile Testing is carried out in accordance with the following standards:
|
|
|
|
|
|
In addition to the written test report, we can also provide the recorded chart and the electronic file containing the raw data.
CHARPY IMPACT TESTING
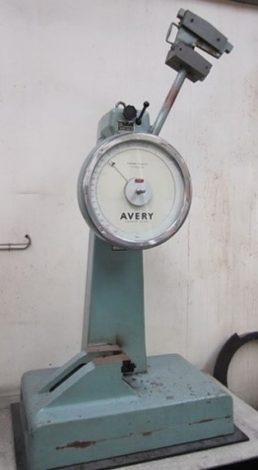
A convenient measure of toughness is the Charpy V-notch Impact Test.
It measures the impact energy required to break a small, notched specimen by a single impact blow from a pendulum and acts as a tool to study temperature-dependent ductile-brittle transition.
These tests are carried out with the specimens at specified (low) temperatures, and the steel material standards specify the required minimum impact energy values for different grades.
Renewed scrutiny in New Zealand for material to meet a minimum toughness for seismic proof applications make the Charpy Test critical to ascertain material’s compliance.
Charpy Impact Testing is performed in accordance with the following standards:
- AS 1544
- AS 2205.7
- BS EN 10045.1
HARDNESS TESTING
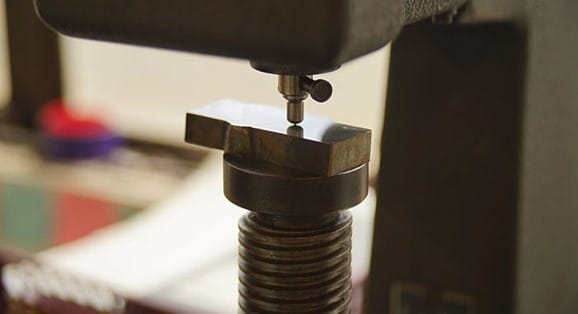
Hardness is a characteristic of a material, not a fundamental physical property. It is defined as the resistance to indentation, and is determined by measuring the permanent depth of an indentation made in it. When using a fixed force and a given indenter, the smaller the indentation, the harder the material.
There are three main methods of Hardness Testing:
- The Rockwell Hardness test method is the most commonly used Hardness Test method.
- The Vickers Hardness test method, also referred to as a Micro-hardness Test method, is mostly used for small parts, thin sections, or case depth work.
- The Brinell Hardness test method, is used to test materials that have a structure that is too coarse, or a surface too rough, to be tested using one of the other test methods, e.g., castings and forgings.
We conduct all three types of Hardness Tests, with the Rockwell Hardness Test performed according to AS 2205.6 and BS EN 10109 standards, and the Vickers Hardness Test according AS 1817 and BS EN ISO 6507 standards.
TESTS USED FOR WELD INSPECTION
We perform a number of tests to assess the weld-strength of various materials.
Transverse Tensile Test
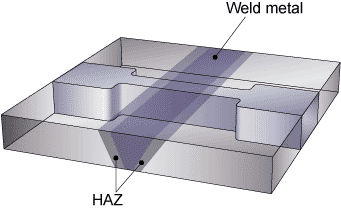
Also known as a pull-apart test, the specimen is prepared to have the weld itself specifically tested for strength.
Bend Test
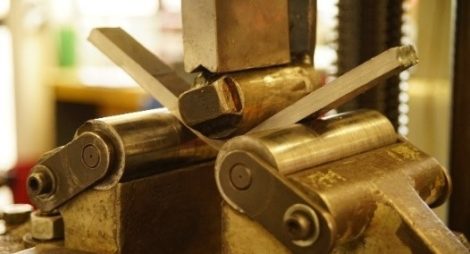
The Bend Test is a qualitative test that can be used to evaluate both the ductility and soundness of a material. Often used as a quality control test for butt-welded joints, the advantages lies in the simplicity of both the test piece and equipment.
Nick Break and Fracture Test
A Weld Fracture Test reveals embedded imperfections. A weld is fractured along an artificial notch machined on the weld centreline and then examined for imperfections such as slag inclusion, lack of fusion, incomplete penetration, porosity, etc.
MTL conducts Weld Inspection Tests in accordance with the following standards:
- AS 1554
- AS 2205.4
- ASME VIII
- ASME IX
- ASTM A370
- ASTM E190
- BS EN 1320
- BS EN 3451
- BS EN 4206
- BS EN ISO 15614
- BS EN ISO 17639

Polyethylene Pipe Testing
Polyethylene pipes are joined through butt weld or by electrofusion. These butt welds need to be tested. Test pieces are machined and tensile tested to failure. The failure mode and tensile strength are then used to evaluate the joint quality.
Similarly, an electro-fused pipe will be submitted to a peel decohesion test and the appearance and location of the failure will be used to assess the strength of the assembly.
MTL tests polyethylene pipes according to the following standards:
- ISO 13953
- ISO 13954
LADDER TEST
Working at height is dangerous, and using ladders further increases the risk.
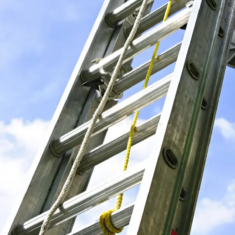
Without regular testing, ladders can become a serious safety hazard despite having no obvious visual faults, this is why ladders need to be tested rigorously according to the relevant standards.
MTL tests ladders according to AS/NZS 1892, making them safe for use in a working environment.
SHEAR VANE CALIBRATION
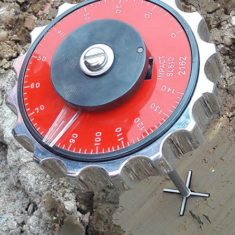
Shear Vane Calibration is a specialist procedure that determines the correlation between the scale on the shear vane and the actual soil shear strength.
Uncertainty of the correlation predominantly arises from the internal spring in the vane head, and the vane blade. Therefore, the calibration certification is valid for the vane head and blade(s) when used as a set.
MTL is accredited to calibrate shear vanes in accordance with a rigorous MTL in-house method.
BOND TENSION TEST
Adhesives are being used increasingly in engineering applications to bond a variety of materials together. Knowing the strength of an adhesive bond is crucial to ensuring a safe final product.
MTL has tested the bond strength of adhesives between a number of materials, such as metal, plastics, and wood by pull testing.
CUSTOM TESTS
MTL has expertise to conduct test specifically adapted to our clients’ needs.
Examples of some tests done: concrete compression tests, balustrades, scaffolding, ceiling tiles (ASTM C635), restraint systems for surface transport vehicles (BS 5759)

